Categories

Showing posts with label Secret Tool Series. Show all posts

Sunday, December 13, 2015

Mandalas, Etch N Pearl Magic & Syndee Holt - Secret Tools Series: Pt 6


Who doesn't love the magic of a Mandala?

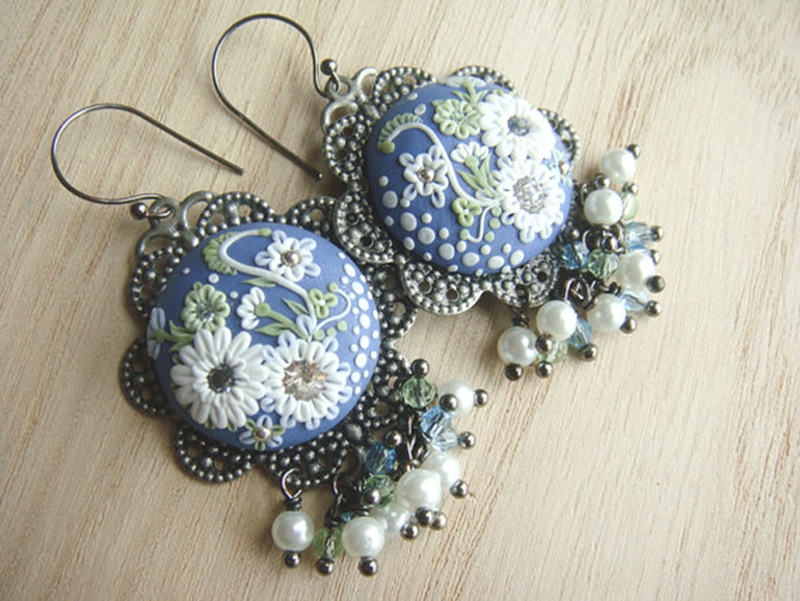
Although we all have our favorite tools & techniques, one of the tools at the Top of my favorites list is the Etch N Pearl 3 piece set brought to us by Sculpey products. They are so versatile & can create the look of Master Art pieces even by novice polymer clay artists. So, what are some of the easy Awesome ways we can play with these lovely ditties? Let's take a closer peak.

Place a center-piece pearl to finish your design
Fill a created space with different sized pearls for a cool dimensional look


Add circles & lines for surface design - quick & easy


Use the smooth sides to clean up rough edges


Create wonderful unique frames for your cabochons


Set includes 3 different sized hole makers 
Easily create home-made texture sheets
Create fun pearl dangles & the holes they peak out from

Turn a simple skinner blend into beautiful jewelry & scarf pins


Create Steampunk, Sea Urchins & Tentacles 


Use the needle tool ends for petite filigree surface work 


Perfect tool for adding findings


Create Polka Dot sheets + Ornate Endcaps


Detailed surface carving decoration


How EASY is it to master these 3 marvels? Here are some great tips & tricks from 
Master Artist Syndee Holt that will have you creating like a pro in no time!

1: Use the widest setting on your Clay Conditioning Machine to make a nice fat pearl.
2: Make your pearls on a smooth ceramic tile so that the pearls will stick to the tile and not in the tool. Then just peel up the remaining sheet of clay to expose your pearls.
3:  Dip the Etch n’ Pearl in water every couple of pearls – again so that they stick to the tile and not the tool. A small bottle cap works great.


Etch n’ Pearls are a great way to add color accents, create frames, cover seams.  They are also easy to get carried away with, like I did with the cutter bracelets.
4:  An empty clay wrapper with a little Sculpey Bake n’ Bond in it, a toothpick and you can securely attach your pearls  (** Note from Liz in Vegas,,, get out your white glue  :-)


5: Use the pokey end of the tool to not only press a hole in the pearl for more texture, but to help secure it to the clay surface below. See how it changes the whole look of the pearl?


6:  Try using other tools to create a texture.  For instance the rubber chisel end of the medium ball tool in the Sculpey Essential Tool Kit or the Style and Details kit makes a great phillips head screw look.  These are great for covering seams in clay like on these faux leather bracelets.
7: The pokey end of the tool makes a great scrap cleaner around the edge of the pearl.


8: Make the large pearl, use the medium ball tool to make a dent in it and add a small pearl of a different color to make a elegant decoration.


9:  Use the pearls to create a bezel for a cabochon. 


10:  Use thinner layers of clay to create polka dots that can be used alone or layered.  I prefer to make the thinner layers on paper so that the clay sticks in the tool until I lightly press it into place.  If the clay sticks to the paper, put the tool back over it and swipe the tool towards you to scoop up the polka dot.


BONUS:  The sheet of clay with the polka dots can be run through the clay conditioning machine to make ovals too! Here are some great examples of how you can use the Etch n’ Pearl tool in my recent creative map


Some other great links to Sculpey projects using Etch n’ Pearls include Amy Koranek’s bracelet where she used the pearls to hold the hardware         


Final Syndee Holt Photo:


Mandala Landscapes - Easy No Fail Perfection

What is it about Mandalas that seems to call to so many of us? The flow of perfect symmetry? The way the colors intertwine, so different & yet perfectly fitted like notes that compose that tune that touches us deep within? Maybe it's that they follow All the rules... & yet seem to break the rules at the same time? 

Maybe it's as simple as... they are just so freakin cool?

I LOVE Mandala Landscape art the same way I Love Natasha's, & adore doing them both for the same reason. Very simply, you really can't screw them up. Once you have a palette that works, the landscapes write themselves! Over the next week or 2 (best laid optimistic plans) I will begin posting my books - TONS of books. They will include boodles of Mandalas, Landscapes & Zentangle art. I'll be sharing the step by steps on how I create the different landscapes. Meanwhile, you can add a set of Etch N Pearl tools to your repertory for under $15.00 & begin having fun mastering the little dynamos.

For today, be well & Happy Claying!
    

Friday, December 11, 2015

Save a Bundle on Clay - Secret Tools Series: Pt 5


I Adore Polymer Clay.What a fantastic versatile medium. IF we can dream it, polymer clay can make it reality! But, it sure can be a costly. I'm always looking for ways to increase my skill & productivity while cutting costs.

So, How do I Save a Bundle creating Masterpieces? 
Here's my Secret Weapon #5


I use Premo as my clay of choice for all my caning & primary color work & translucents, but Sculpey Original is THE weapon you must keep on hand (& in large supply)! It is essential because ...

# 1 - It costs a fraction of what the other higher quality clays cost
Higher quality should of course, be defined. Original Sculpey is extremely strong when compared to Premo, very similar. But, because it is a softer clay it is Horrid (useless) for caning. But because Sculpey White (Original Sculpey) IS very strong & can be yours for under $4.00 a pound (depending on the quantity you purchase) it should be explored. It has a LOT of uses beyond caning & for many techniques is a much better clay.  

# 2 - It is essential to create the type of landscape works you see above
The 'Landscape Techniques' you see above are so easy to do & so beautiful completed... & they can't be done without Sculpey Original. This is true for several reasons. Landscape pieces are created by putting a medium thick layer of Softer quality clay & then placing your 'cutouts' on top of that. Soft is essential so your top artwork layer adheres firmly without any distortion. And, if you do large pieces as I do, or you can only play in your clay for short periods of time, you are going to need a clay that doesn't have to be reworked after the initial condition & rolling. You can do a bit here & there without starting over every time you return.

# 3 - It can be used for bead cores & other areas you would use 'mud'
I think many of us have assumed that our wasted clay, those horrible color blends - & even worse, MUD, serves no purpose other than bead cores or a pendant back that won't be seen. We've all mixed that ugly 'muddy brown' or bland gray that seems to have no other use. Now you can put that 'inexpensive clay' where you may have used your mud before & I'll be showing you truly wonderful & easy techniques to show off that mud in it's best light! Did you know mud could be this beautiful?


Click HERE for PDF of All the Slideshow Photos Above

# 4 - It makes petite filigree, embroidery & other surface techniques a breeze
Having a 'soft clay' base to build your surface techniques on makes strong & secure adhesion easy without investing extra money in liquid clay additives. It colors easily with chalks, paints & other colorants when you need a deeper colored base. And, I mix it with Premo quite often for petite surface work when I need a clay that's a bit more pliable & easier to work.

# 5 - Place your thin canes on sheet of Sculpey Original to make canes go farther.
Placing our cane slices solely on top of sheets of our higher priced clay can really add up price wise & most of the time is unnecessary. Of course, there will be times that it makes more sense to build your sheets on the 'firmer' clays, but you will find many times a Sculpey Original White base is just as good at a fraction of the cost. And it is soft enough, you can add, for example, a pretty good amount of chalk as a colorant & still have a fairly pliable base. 

#6 - IF you work in larger piece work... Sculpey Original is a must!
I do larger piece work, & the process is simple, quick & affordable if you follow this simple procedure...Coat your piece with your white glue as a base to work off of. Cover you entire work surface with an even thickness coat of Sculpey Original, either white OR after tinting. Then cover with your sheets, canes, etc. IF you have an 'add' that is very fragile & you don't want to risk 'altering' or damaging it - simply place another coat of white glue between the layers. 

I'm going to be posting just a few more articles on this 'Must Have Tools Series' & then will be starting a section on 'Unique Techniques' like the Landscapes shown above where I'll walk you step by step through the entire process. I wanted to finish with tools 1st so I don't have to stop in the middle of a technique to explain the logic of steps like this. Granted, many clayers are blessed to be sitting pretty on a nice nest of bucks... they can enjoy the luxury of claying without a 2nd thought to the 'investment' side of our passion. But, for those like myself that have to make the hard choices, say... buy clay or pay all those pesky bills - there ARE ways to cut corners without sacrificing the quality of our work.  This 1 is a Win Win!


On a Final Note

Many artists ask about the 'best' places to buy their clays & materials. I can only speak for myself & my location. Also bare in mind, quantity will greatly affect your prices. As with just about everything you buy, the more you buy the cheaper it is. I built my initial stock up & now only buy in bulk. I live in Las Vegas, Nevada in the United States, but buy predominantly online for the savings.

1: MunroCrafts.com   
  • Orders $50.00 to $100.00 discount is 25% off retail prices
  • Order over $100.00 discount is 40% off retail prices
  • Order over $200.00 discount is 50% off retail prices.
$200.00 is a lot, but you are actually Only spending $100.00 + shipping. Plus they sell ALL accessories you may need, so it adds up quick. They do quick shipping & their clays are fresh. Make certain the items you are purchasing are qualifying purchases.

They run fantastic sales, including small quantities of clay & accessories. They also offer 'flat rate' shipping deals so whether you are buying a little or a lot, you'll get a great deal on shipping. They also offer a few products MunroCrafts doesn't carry. For example, they carry a 3.75 lb of Original Sculpey White, that may be perfect for your needs. As an awesome extra perk, they have a 'Rewards' program, so Every purchase, even sale priced items earn credits for FREE certificates. 

Accumulate Rewards Points and use them to earn Gift Certificates to be used on anything in the store!
  • -- First create an account by clicking the My Account link at the top of the page.
  • -- Then make purchases to accumulate points, one point for each dollar you spend.
  • -- When you log into your account, scroll down to the Rewards section and click "Redeem."
  • -- You'll be able to redeem 250 points for a $10 Gift Certificate, 500 points for a $25 Gift Certificate, or 1000 points for a $50 Gift Certificate. 

I click the items desired to put in my 'shopping cart', but Don't hit pay... instead I finalize by phone. IF you complete order online, be Certain to type 'Flat Rate' Shipping' in the comments box.

3: Michael's Hobby & Craft Store 
I guess they offer mail order, but I've never used that. They offer a coupon online that you can print any time for 40% off 1 item, so if you are making a larger purchase single item... that's great savings. They also have several sales a year where they offer 2 oz clays for .99 cents. That's $8.00 for a pound of clay - sweet! I try to keep a little 'Michaels nest egg' set back for just these occasions.


I did try EBay & Amazon for clay purchases in the past. I found that neither was an 'earth moving' great deal & both times the clay were old & very hard. Beware IF you decide to go that route.

Time to trot here.
Happy Claying... and Saving!


Monday, December 7, 2015

EZ Clay Conditioning, Finally - Secret Tools Series: Pt 4


What a cute opening photo, & I Promise he actually plays a role in my latest clay conditioning discovery. But, before I give you the 3 ULTIMATE clay conditioning tricks, let's take a quick peak at what you DON'T have to do ever again, shall we?


DON'T sit on your clay - Life's to short
DON'T stick your clay in your bra or pants waistline
DON'T add mineral oil to your clay in the name of conditioning
DON'T walk on the packages OR hit unopened packages with a mallet
(Although the mallet is still Awesome for OLD age hardened clay)
Definitely NEVER EVER put in a food processor that you'll spend hours cleaning


Those are at least a few of the silly, time consuming tricks I tried in those early years. We clayers have come a long way - WooHoo!  In this article I will give you the 3 EZ conditioning tools, based on cost. 


Tool #1 = FREE
An astounding price & a tool you already have - your pasta / clay machine. Simply cut your clay into strips & feed those strips into your clay / pasta machine. It will be workable in a few passes. Start on your thickest setting & decrease it as it begins to relax by 1 click. I have a Marcato Atlas Pasta Machine which I understand has sturdier construction than many of the machines designed specifically for 'Clay'. I cut my bars into sections approximately 1/4" thick. Now, it's the only type of clay machine I've used so you should definitely try thinner slices until you know what your polymer clay machine is comfortable with, ok? 


Tool #2 = Very Inexpensive ($10 - $25)
I had my heat gun out sealing a baked piece with UTEE embossing powder & just for giggles, hit some nearby unconditioned clay for a few seconds. Hence, tool #2 was born! You can use your blade to cut a 2 oz bar in half, & then cut a 't' into each half - creating 8 separate pieces. 


Give the pile a little 'bump' to knock them away from each other & open the spaces between them & then hit them with your Heat Gun for 6-8 seconds, easy cheesy done. You will be ready to work comfortably by hand in no time flat! I leave my heat gun standing on end out of a mason jar to keep it handy because the little wire stand isn't sturdy. IF you don't have a 'heat gun', they really are inexpensive & most will last for years. Extra added perk - embossing on polymer clay Rocks! Here is the 1 I always used...

Darice Embossing Multi-Purpose Heat Tool - $11.43 + FREE Shipping


Behold, tragedy ensues & I must devise a New Way
Tragedy, in this case, refers to Mickey...
AKA "the Terrorist'


How I can adore something so rotten defies logic, but I do! So... when his terrorist activities hinder my clay play time, I adjust. In this particular case, he developed a strange passion for chewing through my heat gun wires. I haven't got the slightest idea what that's about, but after he ate through my 5th heat gun in a matter of  2 months - it was time to try a new thing. I didn't want my sweet innocent baby fried (yes - I live in a world of denial  :-)  & I was sick of buying heat guns, So, I treated myself to...


Tool #3 - Never Knead
What an awesome dandy tool this beauty is! I'm a bit slow to invest in the slightly higher priced tools (ok, we can say it, I'm Cheap!) My NeverKnead is the BEST clay investment I've ever made, what an awesome tool... & also a toy because it has made conditioning my clay fun. I do 6 pound canes & slabs & simply conditioning my clay was an all day chore before. Now I breeze right through it.

Deb, the creator of NeverKnead, also provided me with a gorgeous 'Lime Green' NeverKnead that is cheery & bright & color coordinates with my workspace perfectly!


IF your Budget allows, you'll NEVER be sorry for buying a NeverKnead... 
they are Awesome!!!

We don't know what tomorrow holds, but at the time of this writing, IF you are at


& spend a bit of time looking around, 
there will be a pop-up offering a 20% discount - WOW!!!
I suggest you act quickly, that's an Amazing deal!


With that said, I'm off & running.
Hugs & Happy Claying from Liz & Micky in Las Vegas  


Tuesday, November 24, 2015

Never Sand Again: Seriously! Secret Tools Series Pt 3

  I'm an 'Old School' clayer. I began claying in 1995, before the internet & a gazillion wonderful talented artists were at the ready to give sound advice for every polymer clay dilemma known. I do remember the 1st polymer clay book I purchased talked about the woes of fingerprints that can ruin our artwork. I had never seen a fingerprint in my clay, but I actively searched for them after that. Hmmm... no fingerprints... ever.

  Recently, I came across yet another article discussing the woes of fingerprints here on the internet. I had to really stop & think, why do so many clay artists find this a problem & it just never has been an issue for me. I never wear latex gloves & although I do strive to make my work clean, I'm not overly fussy to the point of anal with my projects. Plus, I have Never in all these years sanded a piece - EVER! Then, the lightbulb went off, I answered that age old clayers question & knew I should share the answer.

  Being 'old school' without any counsel... I recognized clayer issues & jumped for solutions. My interest was in covering larger pieces, but it was sooo hard spreading the clay uniformly over that 1st piece. (Giggles - I hadn't even heard of a pasta or clay machine.) I had popped in at a thrift store & found a gadget. I had absolutely no idea in the universe what it's purpose for existing was, but the minute I touched it I knew it was the solution to smoothing my clay. There was a plastic back that fit in the palm of my hand & it had this fabulous pad of 'something' - slightly softer than firm rubber but much firmer than a composite styrofoam. I picked up 4 of these 'whatevers' for a buck 2 decades ago & still have 2 left - WooHoo!    

  And what incredible 'doomahickies' they are! I press my gadget into my palm & use a kind of rolling action, pressing the base of my palm against my piece & roll upwards to my fingertips. And, because it's a larger gadget, it covers a Lot of surface quickly. Well, I had to do some real gadget surfing to even figure out what these little beauties are. A drumroll please as I introduce you to my beloved 'thingamadoohickie'...

I think this is them - WooHoo! Not much to look at I guess, you Really need to be able to touch that black pad that creates the finish on your artwork - Wow! Solid, smooth, perfect finish... Always! And so easy! No exaggeration, I have Never Ever sanded a piece, ever! I grabbed several gadgets to show you, but this looks exactly like what I have. They are called EZ Moves II & are made to move furniture on a carpeted surface. And, at $15.50 + FREE Shipping / set of 4 they are still a great buy. Keep in mind, I'm an 'Amazon.com' kinda gal... you may get an even better price at a store like Wal-Mart. Here's a few more to take a peak at OR you can google furniture moving pads. The 2 things to look for in your gadget are #1 - that hard plastic back plate that allows for firm uniform pressure application & #2 - the thickest 'cushy pad' possible.
The company never gives the 'pad thickness' but one of the posters comments says nearly an inch
Thickness is iffy, but a good bargain

These 5" squares have no plastic backing But you can see they are thick & well made
For smaller sized pieces these might be great siliconed to a piece of acrylic  or wood

Since this ol gal has Never sanded, you may be wondering about the finish on my pieces. Pieces are always perfectly smooth, never a mark or blemish. I have 3 final finishes I use. The 1st is 'natural', which looks much like any piece fine sanded & then completed with a matte or non high gloss finish. The 2nd (which I do most often) is to brush on a single coat of water based Varathane for a high polished glass-like finish. I do use 2-3 coats for pieces I'm putting outside. Not to protect them from the elements - polymer does fine outside without any seal, but I like to be able to clean off dirt & dust easily. The 3rd & final finish is to 'polish' the piece with my Dremel & wonderful buffing pads, from Amazon.com of course. It's pretty quick & easy  & my pieces really do look like genuine blown glass with a beautiful 'deep' glow. Here's a few of the Buffing pads I use if you are looking for ideas.


Left - 1.25" top, 2" base Cone Buffer       $7.72 + FREE Shipping
Middle -4" Extra Large Mushroom Buffer       $10.99 + FREE Shipping
Right - 3" Medium Mushroom Buffer       $6.99 + FREE Shipping


It just occurred to me, you may be thinking I'm starting to sound like an Amazon.com commercial... I sure hope that isn't the case! The way I view it... polymer clay can be an expensive hobby. I'm Always on the look-out for ways to cut expenses & work while bringing out the very best in our creations. Are furniture moving pads an expense you need? Well, you'll Never have to buy sand paper again... that savings will add up, right? Giggles, & hearing many of the artsts explaining the 'Joy of wet-sanding'... I get the impression they would pay someone to do that chore if they could  :-)

Off to show you how to save boodles on your clay expenses. (no amazon.com visits)
As always... Happy Claying


Monday, November 23, 2015

THE Tool Every Polymer Clay Artist Must Have...Seriously! Secret Tool Series Pt 2


Each of us were drawn to Polymer Clay for different reasons. For me personally... I adore clay because it's the Only medium that can mimic all of my passions in 1 fun filled playground! I love stained glass, Polymer can do that! I Love blown glass beads, mosaic work, natural & polished gemstones, ornate stone settings, & above all - I Adore millifiore & blown glass paperweights. Our polymer clay can do all that, and then some! We can perfectly duplicate carved ivory & bone (without ever harming a lovely critter), I enjoy covering boxes of cardboard, canisters, wood boxes, fired raw (unglazed) ceramic pieces, ceramic pots & vases & metal pieces of all types. And, of course... where would we be without a whimsical teapot or some uber cool steampunk art in our eye candy collection. Even wonderful delicate jewelry pieces NEED this secret weapon... & I've never heard anyone discuss them


Weapon #2 & THE Most Wonderful Tool:


Like Superman... they are quiet, boring, unassuming
Until it's time for them to rock our playground!


Plain old 'white' glue is categorized as PVA glue – PolyVinylAcetate. I positively
refuse to bore any of you with 'scientific' mumbo jumbo, so let's just say... they
are a match made in heaven! It can be used wet or dry & has 1001 different
clay related uses. I've been using it since 1995, not only has it opened a whole
new universe of 'Clay Play' possibilities in jewelry making, but... in
understanding the basics of PVA – it opened a whole new world of items I
can play with. Resin statues from thrift stores (ugly as sin) can be breathtaking
covered in clay. A ceramic pot with a big chip is like new & stunning
combined with a lovely clay coat. Plain old cardboard boxes become works
of art. ANY item other than 100% plastic is fair game now. PVA doesn't just
seal – it creates a 'suction cup' type of finish... NO more air bubbles!

Here's a few examples of 'thinking outside the box.


 Raw Unglazed Ceramics                     

  I pick up pieces at ceramic stores
  & thrift stores. Inexpensive! Slap on
  a coat of glue with 1 of those cheap
  sponge brushes, allow to dry for an
  hour & put on a 2nd coat. Wait
  another hour & you will have a perfect
  non-pourous surface & your clay will
  stick like magic with NO bubbles!


Ceramic Tiles are in Clay!

Coat tiles & then create 1 single
tile OR create an entire mural 
as a backsplash for your sink. 
I'll even be sharing tutorials for 
mosaics & other fun stuff.
Raw = 2 coats of glue.
Already sealed = 1 coat.

FREE pattern books to come


Any Glass ~ Etched, Labels  or Raw,  etc
Glue creates a type of suction cup action on glass (& ALL non-porous surfaces). 
No more air bubbles!
Raw = 1 coat glue.    Paint, labels, etc = 2 coats


ANY Wood ~ Raw OR Sealed
How about a raw wood cutting board to hang on wall?
 2 coats of glue & you are good to go. 
$1 Stores here in Las Vegas sell raw wood bird houses, statues & photo frames.
Let your imagination soar! 
                               Raw = 2 coats glue.      Already sealed = 1 coat


 Dimensional
      Pieces

Use Everywhere
you might think
about using Liquid
Clay for strong
sturdy pieces that
will last, even with
a lot of handling


Secure Jewelry Joints
 
Locks all joints, findings & even
multiple stamped
sheets sturdy as soldering


Other 'White' Glue Benefits:
Can fill a Crack or Chip
Rubbery, has a bit of Flexible to it
Strong to handle Heavy Needs 
Can be Used while wet OR dry
If used after drying - forms suction
Strengthens Fragile Objects
Good even outdoors & in heat/cold
Sets quickly Without a heat gun
Dries clear with a glossy sheen
Can be tinted with acrylic paint, chalk & inks

ALSO Used for Specialty Techniques we'll be looking at like:
Faux Cloisonne', creating Cabochons & several other techniques 

Best of all, it's dirt cheap - WooHoo!
I stock up on Elmers All Purpose at the 'back to school' sale.
 Then I simply buy a gallon here or there from Dick Blicks


         Go ahead, 
   build that Teapot

            Build your 
    Heavy Journal
cover on Cardstock

       Have Fun 
   Experimenting!


See the Next 2 Posts for a few more Secret Claying Tools
#1: Never Sand Again ~ #2: Save HUGE $ on your Clay
 
& as always... Happy Claying

NOTE: Alice Stroppel has done it yet again... 
shared her Brilliant idea to store canes for easy access.
you can read the whole story right here...      Alice Stroppel Studio 215  
Be sure that you sign up for her Email OR G+ OR Bloglovin - She Rules!

Meanwhile - her post recommends clear plastic stackable storage bins for cane display
Since PC & hard plastic aren't compatible, 
she recommends tempered glass sheets for each tray.

This is an Excellent idea!

IF your budget is tight OR the support the trays sit on 
can't handle the extra tempered weight...
get out your 'White Glue'

Put on 2 coats with 1 hour dry time in between & You will be good to go
& don't forget to do the side walls, just in case a cane touches


Ok, now for a heads up on how to avoid sanding... ever!
Happy Claying