Categories

Wednesday, October 28, 2015

Wirework Dragonfly - WireworkersGuild.blogspot.com

DRAGONFLY TUTORIAL


What a lovely week!
I really enjoyed filming my second
CREATE and CRAFT TV programme,
meeting the lovely, talented Dawn Bibby and
making all the samples using beautiful
materials from BEADS DIRECT!

I hope everyone has now got themselves
a WHAMMER and is finding
the benefits of using a hammer that is
totally and utterly designed to get the
best results out of wire!

As always with these programmes, there is
never enough time to showcase all the demos
I prepared and I was rushed to finish my
Dragonfly ... so, to make amends, here is a
step by step version.


1.  Cut approx. 8"
20cm of 0.8mm
(20-gauge) wire and
place your round
nosed pliers about
a third along and
bend in two.

Pick out 4 crystal
beads for the
'body' plus one
slightly larger
bead for the 'head'.


2. Thread one of the 'body' beads onto
the shorter length and wrap the longer
wire around the side of the bead and
once around the top to keep it in place.


3.  Add 3 more beads in the same way,
but after the 4th bead, wrap the wire
4 times around the stem (as more space
is needed here to secure the 'wings').


4.  Thread the 'head' bead on and secure
the wire around above it.


5. Pull the projecting wires out into a
'V' shape and form into spirals to create
the 'antennae'. Use your Whammer
and block to flatten and work harden
the ends.


6.  To make the wings: cut approx. 12" (31cm) of
0.8mm (20-gauge) wire and wrap the centre of the
length once around the body stem, just under the 'head'
bead to secure.


7.  Place your round nosed pliers (or any circular mandrel,
such as pencil) approx. 1.5" (3.5cm) from the centre
stem and loop around to create the top wing. Wrap the
wire once around the centre to secure.


8.  Using the rest of the projecting wire, create the
remaining top and bottom wings. I made the lower
wings slightly smaller than the top ones. 


9.  Secure the ends of the wires by wrapping once
around, just under the top bead and any remaining
wire can be spiralled and flattened down to cover
the wraps underneath.


10.  You can Whammer hammer the wings BEFORE
wire wrapping them all with 0.4mm wire.


... And here, for your delectation, is the finished piece
with a bit more tweaking on the wire-wrapped wings!


In my book, 'Making Beautiful Bead and Wire Jewellery'
(page 110-113) I created the dragonflies as hair grip
decorations and used 0.5mm coloured wires, plus a
few sparkly beads to decorate the wings. 


I have also created them as necklace pendants.
These wings were shaped around a pen and are
chunkier, making the piece look part butterfly.
I think I will call this a "Buttdragfly", or perhaps
a "Dragbuttfly".  No! Maybe not!! 


They are great motifs to put onto greetings cards, hair
fascinators, cake decorations, bouquet embellishments,
plant sticks ....
HAVE FUN CREATING YOUR OWN!

Happy Wireworking! and catch me again on
CREATE and CRAFT TV on Saturday 30th August
and again on 6th September (I've got Coiling Gizmo and
Jig inspiration coming up ...). 


Halloween Sleeping Bat Pendant - Velvetorium


You will need:
-Black polymer clay
-Ball tools
-Needle tool
-Xacto knife (or other utility blade)
-Rolling pin (or pasta machine)
-Mica powder & brush
-Sculpey Bake 'n' Bond
-Pin


Sunday, October 25, 2015

Skinner Blend Butterfly Cane - Daniela Mini


Make a Stroppel Round Natasha Bead - Fulgorine

How to Make a Stroppel Round Natasha Bead


Ok, so my previous post about how to make a Stroppel cane Natasha bead confused even me, so I will try again – this time with pictures. If you don’t know how to make a Stroppel cane, have a look at this free tutorial.


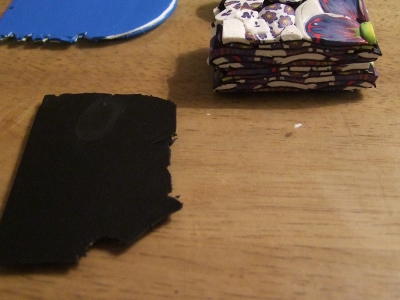
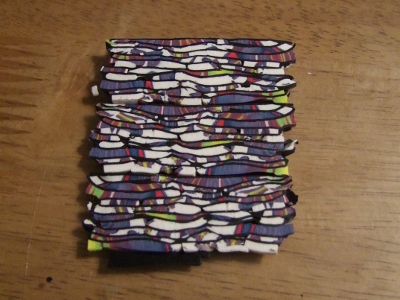
                                                                                                      First make your Stroppel cane. Then make another but this time using slices of Stroppel cane.


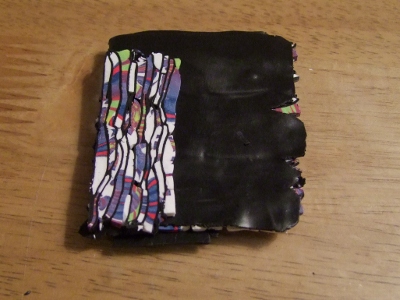
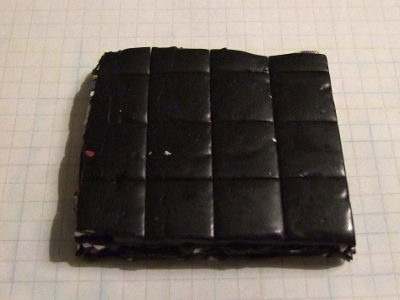
Make a layer of Stroppel cane slices going in one direction


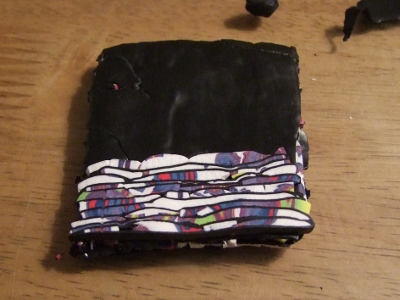
Add another layer of black and then place your slices at 90 degrees to the first layer.


Another layer of black, and more slices going in the other direction.


Repeat until you have a block to the thickness you want. Trim the edges and cut into cubes.


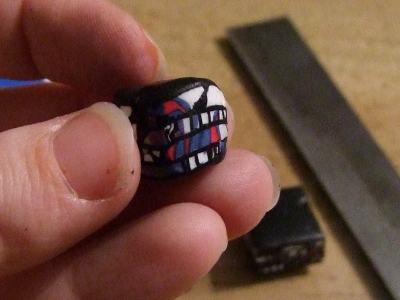
I like to offset my designs so there is a diagonal element to the finished pattern. Squish your cube roundish.


Squish back into a cube at an offset angle.


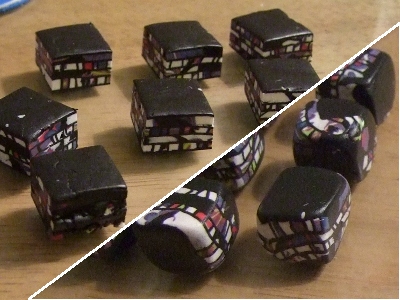
Cubes with offset squish ready for Natasha-ing
(See my post about how to make a round Natasha bead.)

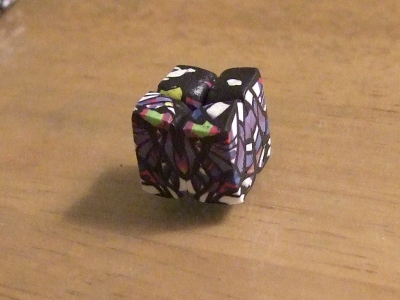
Natasha cube

Natasha bead cube

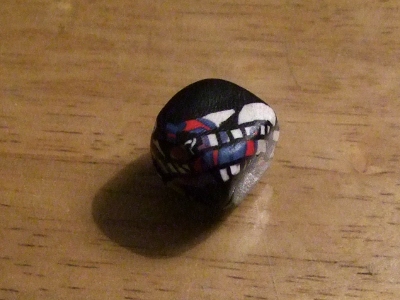
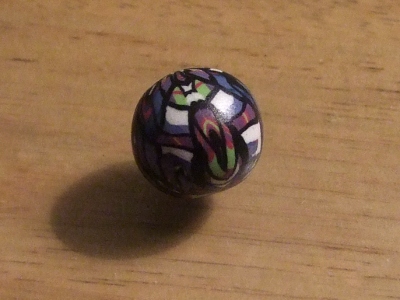
Natasha bead round

Natasha bead round
Finish your bead as normal. Enjoy!

Adjustable Bangle with a Dangle - Ornamento

Adjustable Bangle (with Dangle!)

by ornamento

 
Adjustable Bangle with Dangle

This is a story of how I designed a new bracelet that are intended to be gifts. I love bangles and sizing is always an issue.  I know that the intended recipients are relatively small women but I didn't feel comfortable enough to guess their hand sizes and make conventional bangles.  I decided to make something that could accommodate different sizes.

Brass1

I started out with thick brass  wire forms that I  purchased at Wolf Myrow  a few years ago.  I had originally thought they were tubes.  In fact, they were solid wire maybe 8 gauge.  I like the look of square wire so I annealed them and  squared the wire in my rolling mill.

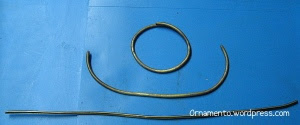
Stages of wire
This picture shows the same wire in three stages.  The top shows how it started out, the middle is after bending and the bottom is after a few passes in the rolling mill.  The wire gets  thinner and longer.  You have to be careful not to reduce it too fast or you will distort the edges.  And you also have to make sure the wire is properly annealed.  Brass wire is hard.

imageedit_30_2195065449

After I squared the wire,  I annealed it again and shaped it around a bracelet mandrel.  I hadn't yet decided what to do with the ends.  I ended up sawing off a few inches,

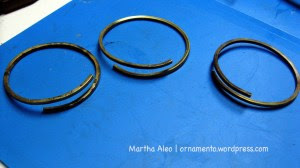
Formed Wires

Here are three bracelets with the ends sawed off.

Design Consideratons

I was considering soldering some bronze metal clay medallions that I had made earlier onto one of the ends or the middle of the bracelets, but I thought it would look wonky.  Plus if the medallion was in the middle of the bracelet, the solder would get wear from the bracelet flexing when it was put on and taken off.  So why not try making a dangle from a medallion? The brass is so hard that I made a mock up in copper to see how I liked the idea.

Copper detail 

I drilled a hole in a copper bracelet and fashioned a dangle from a copper metal clay medallion.  I like the bracelet and the medallion-just not together.  For one thing, the dangle didn't move the way I liked.   I was limited in the side of the jump rings I could use because the hole in the bracelet could only accommodate 20 gauge wire.  And the medallion only had one interesting side.  That would work for a pendant, but not for a focal dangle on this bracelet.

holes drilled in center of bangles

Speaking of hole drilling,  did I mention that brass is a hard metal?  Still I was able to drill a hole in each bangle pretty easily, with patience, the right tools, and some safety precautions.

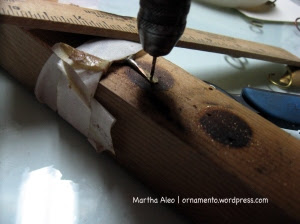
Drilling

When you drill a piece of metal, you need to tape it  securely to a sturdy piece of wood with masking tape.  As you drill, the metal and drill bit get so hot that the wood smokes.  See the  dark spots?  Those are burn marks from prior drillings. You remove metal when you drill and it scatters like dust.  I like to wear safety glasses and a dust mask when I drill like this.

Bdangle detail

I finally settled on dangles made from brass shapes I originally made for a necklace clasp I designed.  I drilled holes in them, added porcelain beads I made many years ago, and attached then to the bracelet with a jump ring that I soldered for added security.

B2

The bangles have enough give to open wider when you put them on and you can close them a bit when they are around the wrist.  I rounded off the ends with a file and sanded them smooth to make the putting on and taking off as comfortable as possible.
By the time you read this,  I will be on my way to deliver them to the recipients.  Of course, I had to make one for myself, too!


Succulent Pot & Garden - Erzsébet Egri


Awesome Polymer Mural Art - Artistic Variations